Everything had been working pretty well. I was driving my car 4 days a week and charging at work. I had put 2600 miles on the Jetta this way. Of course, charging at work was not ideal. A couple people showed up with Nissan Leafs and wanted to “share” my plug. It was hard to get the word out that I _needed_ the spot by the cooling plant or else I couldn’t go home. Then the weather started to get “cold”. This is San Diego, so “cold” means it was getting under 40 degrees Fahrenheit at night. One morning in mid October, I ran out of power about 2 miles from work. The Jetta was able to creep in to the office in “limp home” mode, but I realized I was asking it to do more than it could do. The Fullriver AGM batteries were just not adequate.
I parked the Jetta at home and went back to driving my gas car. I started planning my upgrade to LiFePo4 batteries. I have been following Jack Rickard and a lot of the threads on diyelectriccar.com. There are also a couple Kick Gas Club members who have LiFePo4 batteries. I had heard a lot of good things about CALB batteries. Their distributor, Calib Power, is located pretty close by in Pomona. I did some calculations and figured I could fit 56 of the 180 AH cells in the space that my 15 Fullriver DC100-12 batteries were occupying.
The only question was the vertical clearance under the hood. I built a wooden model of the CALB SE180AHA cell and tried it in a few positions to see how far forward it could be without interfering with the hood. Based on this, I decided to eliminate 2 rows of cells up front (6 cells). This took my total down to 50 cells, for a 160V nominal pack. It seemed reasonable to reduce the cell count rather than completely rebuild my front battery box.
For charging, I purchased a Zivan NG5 used back in the fall of 2010. I hadn’t used it with the AGM batteries because I wanted to experiment with using Minn Kota chargers to charge each AGM battery separately. I sent the Zivan NG5 off to Elcon in Sacramento for reprogramming for my 50 cell, 180 AH lithium pack.
I worked with Keegan at Calib power to get my batteries. Everything went very smoothly. I paid him a check about a week in advance so it would have a chance to clear. Then I drove to Pomona to pick them up. The batteries were new in their sealed crates with manuals and manufacturers testing reports. They come 14 to a crate, so there was one partial crate with 8 batteries in it. I also bought the CALB copper interconnects and terminal hardware.

Batteries new in crate
The next step was mounting the batteries. In the front, I built a frame from 3/4″ square steel tubing and 3/8″ threaded rod. This compresses the batteries together and then holds them down on the existing platform. I used Industrial Metal Supply in Kearny Mesa for my metal needs. They are great. I especially like that I could order my pieces cut to length over the Internet and then go pick them up at will call.
The rear box dimensions I had originally designed with lithium batteries in mind. So, the batteries dropped right it. I just had to add some high density foam packing material around them to take up the extra space so they wouldn’t rattle around back there.

Dry fit the batteries in the rear box
I bought a lot of battery covers from VTE outlet in Michigan. They seem to have the best prices on them and I feel better having all the terminals individually covered. I also bought some terminal posts from VTE for my small gauge wiring.
For balancing, I decided to forgo a battery management system. I used a CBA III battery analyzer to drain a couple batteries. I found they were in the ballpark of 80 ah. I charged the ones I drained back up to about 80 ah (using a bench supply and a christmas light timer!) and then drove the car about 30 miles. After that, I took the CBA III and connected it to each battery. I used a USB isolator from Phidgets to keep the CBA III from blowing out the USB port on my computer. I drained each battery at 30 amps down to 2V (as shown in the CBA software). This sounds kind of low, but I was using a really long 10 gauge cable to connect to the batteries. The batteries themselves did not go below 2.5V. The CBA III kept track of the amp hours it took out of each battery. The batteries all had between 13 and 30 ah remaining in them. So, for 180ah batteries, they came from the factory pretty well balanced.

Bottom balancing new batteries
I have a PakTrakr system with 3 remotes from before. I was planning on monitoring my batteries in sets of 3. Then I realized that the PakTrakr draws 9mA from the primary battery on each remote. Over the course of a year, this would draw almost 80 ah extra from the primary batteries, leaving them significantly out of balance. My plan is to put a switch on the most negative leads of the PakTrakr remotes so I can switch them on when I need them. There’s really no need to monitor all the batteries 24/7.
I did run into one unexpected issue when connecting the batteries. CALB only offered one size of terminal interconnect, so I mistakenly thought it would work for connecting batteries in either direction (across the short end or across the long end). It turns out that connecting batteries where the long sides match up is considered a “standard” connection. Connecting across the short ends requires a slightly longer interconnect. I ended up buying copper 3/4″ x 1/8″ bus bar from Industrial Metal. I got some help from a friend at work (thanks Son!) drilling them all out with the holes in the right places.

Terminal Interconnect Spacing
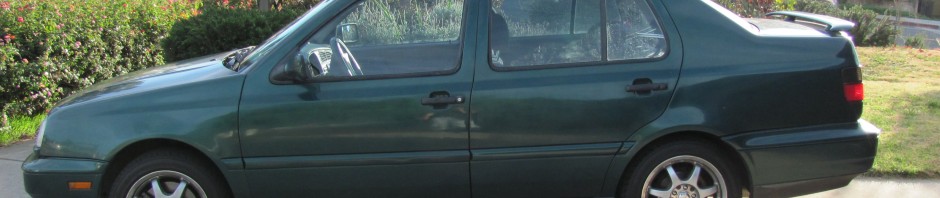
Now I’m driving my Jetta again. My range was just under 15 miles with the AGM batteries on a nice summer day. My maximum range with the LiFePo4 is still untested, but I’ve driven it over 40 miles a couple times. There’s a lot of great things about the upgrade. The old battery weight was 1050 lbs. The new battery weight is 600 lbs. Handling is vastly improved. Also, the new batteries are compressed together so they don’t rattle anywhere near as much. Not having to charge at work is awesome. The only downside is the upfront cost ($1.20/ah, which comes out to about $10,800 for my set). Still, anyone building from scratch should really consider using LiFePo4. After you spend all that time on a project like this, you will really want to end up with a car you can use every day without any hassles.